Getting started with Traefik and Docker
Traefik is a versatile cloud native router that can be used with many orchestration tools (swarm, nomad, and kubernetes). The easiest way to explore Traefik is with Docker Compose.
If the end goal is to build a simple static site (blog, portfolio, marketing page), then Traefik is likely overkill. Free hosting solutions like Vercel and Netlify are better options. If your requirements get more complex, it may make sense to evolve to Traefik and Docker Compose.
Here are some scenarios where I'll consider Traefik + Docker-Compose setup.
- Mutiple technologies needed for the app. For example, a React front-end, a Node/Express backend, and GoLang services.
- Need to support multiple domains and/or subdomains with TLS Certificates (HTTPS), which is a best practice for any modern apps.
- Self-host an open source tool like Strapi or OpenFaas that doesn't have a hosted option.
Tutorial Requirements
Locally
- MacOS or Linux Machine (have not tested on windows, but likely works)
- Docker Desktop
Deployed/Internet Accessible (only needed when you are ready to deploy)
- Linux virtual machine - I recommend Digital Ocean ($100 credit when using this link)
- A domain name (preferably one not in use)
- Ability to update the DNS entries for your domain (we'll add a A and CNAME record)
Building in stages
Let's build a solution in steps so we have a better understanding of how it comes together
Running Locally - Get Traefik Dashboard Working
Create a new file named docker-compose.yml and add this yaml
version: "3.3"

services:
  traefik:
    image: traefik:v2.3
    command:
      - --log.level=INFO
      - --api.insecure=true

    ports:
      - "8080:8080"
Explaining the Configuration
- This is a basic
docker-composefile. Docker compose usesYAMLconfiguration. - We set the
log.leveltoINFOvia a command. The default isERROR. I like to set this to INFO or DEBUG for Traefik during development, and ERROR once stable in production. - we set
api.insecuretotrue. By default, this is set to false and won't display the dashboard locally (needs TLS cert).
This compose file isn't doing much yet. It simply launches our Traefik container. We could have started the Traefik container directly in standalone mode, but knowing that our final solution includes docker-compose, it made sense to start here.
The equivalent docker run command to the compose file above would be:
docker run -p 8080:8080 traefik:v2.3 --log.level=INFO --api.insecure=true
This is why these values are called commands in the yaml above. They translate into command line arguments for the container. These are considered Static Configuration, which I'll cover in more detail in the Q/A section.
From the directory where your docker-compose.yml file is located, type in the terminal:
> docker-compose up
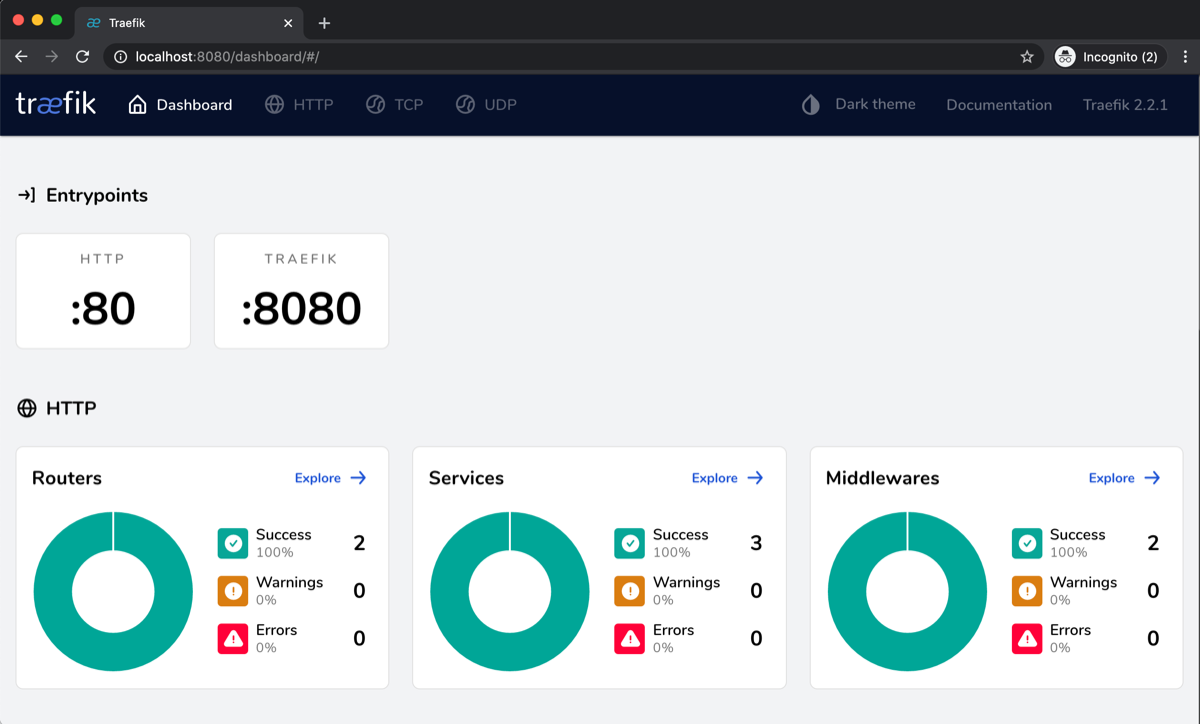
You can now navigate to the Traefik dashboard on http://localhost:8080 and see the dashboard.
Add Two Sample Containers
Now that Traefik is running with docker compose, let's add a couple docker containers that will help with testing. I have chosen two very popular whoami docker images that simply output information to a webpage:
- containous/whoami - Prints OS information
- jwilder/whoami - Prints it's container ID
Update your docker-compose.yml file to
version: "3.3"

services:
  traefik:
    image: traefik:v2.3
    command:
      - --log.level=INFO
      - --api.insecure=true

    ports:
      - "8080:8080"

  hello:
    image: containous/whoami
    ports:
      - "8000:80"

  whoami:
    image: jwilder/whoami
    ports:
      - "8001:8000"
Explaining the Configuration
- Added new service entries for the two new containers, hello and whoami.
- These containers are not proxying through Traefik yet. Docker compose is handling the traffic from the host port to the container port
"[host-port]:[container-port]" - You should be able to navigate to
http://localhost:8000andhttp://localhost:8001and see the running whoami containers.
We still aren't taking advantage of Traefik. Here we just added two containers so we can test routing and subdomains in subsequent steps.
Stop the running instance of docker-compose with [control]+c
Restart docker-compose, but this time in detached mode to simplify these steps moving forward.
> docker-compose down
> docker-compose up -d  # this will run docker-compose in detached mode
Let's Proxy Our Traffic Through Traefik
We can now start using the power of Traefik and make sure all our request are routed via Traefik. Make the following changes and restart docker-compose.
version: "3.3"

services:
  traefik:
    image: traefik:v2.3
    command:
      - --log.level=INFO
      - --api.insecure=true
      - --entrypoints.web.address=:80
      - --providers.docker

    volumes:
      - /var/run/docker.sock:/var/run/docker.sock

    labels:
      traefik.http.routers.dash.rule: Host(`dash.localhost`)
      traefik.http.routers.dash.service: api@internal

    ports:
      - "80:80"

  hello:
    image: containous/whoami
    labels: # auto-detects port 80 in next line
      traefik.http.routers.hello.rule: Host(`hello.localhost`)

  whoami:
    image: jwilder/whoami
    labels: # auto-detects port 8000 in next line
      traefik.http.routers.whoami.rule: Host(`whoami.localhost`)
Key Learnings
- We removed all port entries except for 80. We also added
- --entrypoints.web.address=:80. We will be routing all traffic through this single entry point, including the Traefik dashboard. - We set docker as a provider with
- --providers.docker. This tells Traefik to retrieve configuration directly from Docker. - We added a new Traefik
volumessection and map the host containers socket, to the container socket with- /var/run/docker.sock:/var/run/docker.sock. In short, this is how Traefik can utilizeDynamic Configuration(see Q/A) - We added label sections to each service, and a routing rule (basically the domain/subdomain) to reach each service. Traefik will auto-detect the port for the running container.
- In the traefik labels section, we tell the route to go to
api@internalwhich is the service name to the dashboard.
Restart docker compose
> docker-compose up -d # updates services in place with the new configuration
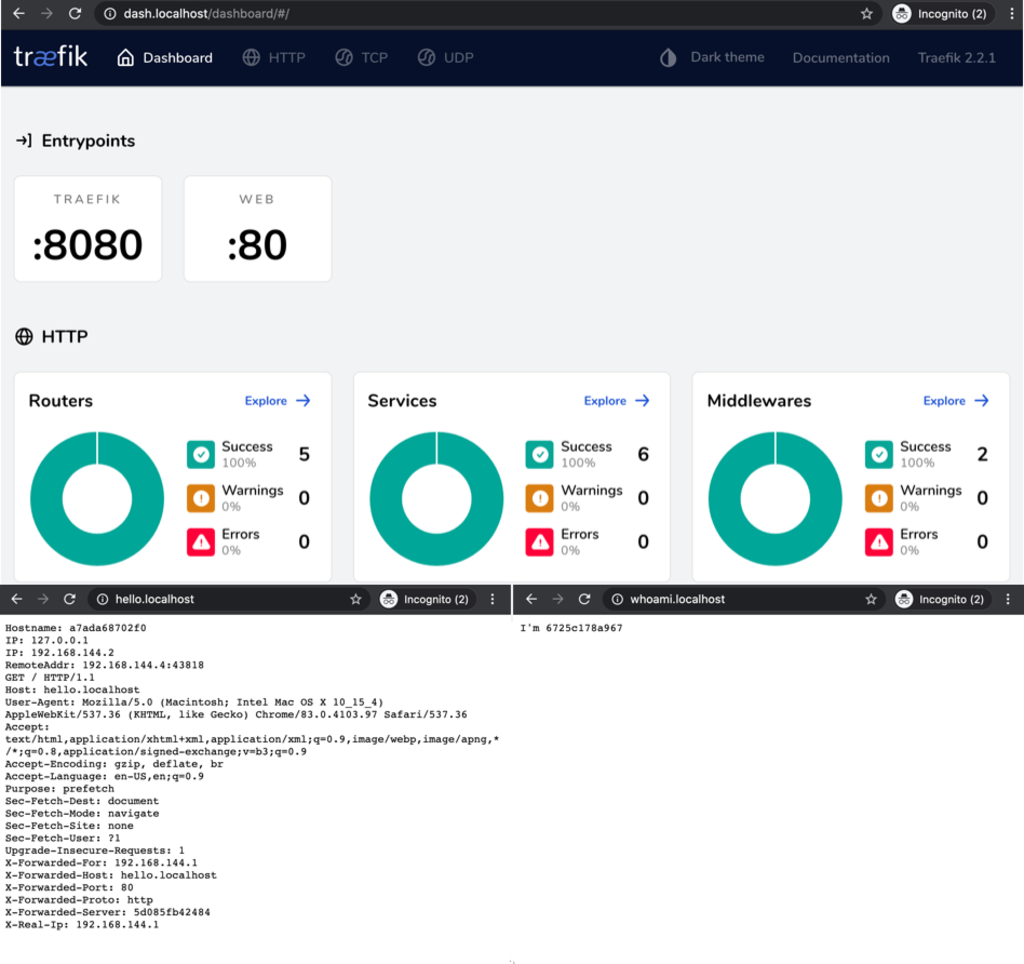
The Traefik dashboard and containers will now be available via their hostnames instead of by port number.
Navigate to http://dash.localhost, http://hello.localhost, and http://whoami.localhost
We have completed our simple example of Traefik and Docker Compose locally and learned some key concepts. Let's take what we learned and deploy to a VM on the internet.
Setup your VM with Docker
For this next section, you'll need a virtual machine (VM). You could use almost any provider, but I'll be using Digital Ocean for this example (the basic $5 Ubuntu Droplet).
Each provider will have different steps to provision and get SSH access, so I'm going to skip these parts and assume you have SSH'd into your new VM.
Install Docker
Docker provider a simple install script at https://get.docker.com/. Run the following two commands.
# retrieve the docker script and save it locally
> curl -fsSL get.docker.com -o get-docker.sh

# install docker. Command takes ~1 minute due to running apt-get update
> sh get-docker.sh
Create your docker-compose file locally
If you know how to sync your compose file, feel free to do so, otherwise simply copy it or retype it. We'll need to make a couple small changes. You won't be able to use localhost on the internet, so here is where' we'll swap localhost for your domain name. My domain is called code1.site, but please use your domain in this place.
- dash.localhost >> dash.[your-domain].[tld]
- hello.localhost >> hello.[your-domain].[tld]
- whoami.localhost >> whoami.[your-domain].[tld]
Here is my docker-compose.yaml file after I swapped the domain names.
version: "3.3"

services:
  traefik
    image: traefik:v2.3
    command:
      - --log.level=INFO
      - --api.insecure=true
      - --entrypoints.web.address=:80
      - --providers.docker

    volumes:
      - /var/run/docker.sock:/var/run/docker.sock

    labels:
      traefik.http.routers.dash.rule: Host(`dash.code1.site`)
      traefik.http.routers.dash.service: api@internal

    ports:
      - "80:80"

  hello:
    image: containous/whoami
    labels:
      traefik.http.routers.hello.rule: Host(`hello.code1.site`)

  whoami:
    image: jwilder/whoami
    labels:
      traefik.http.routers.whoami.rule: Host(`whoami.code1.site`)
This Article is in Draft / Incomplete Status
This article is currently being written. Expect frequent updates and completion within the next few weeks. I often release early to motivate myself to finish the articles :)
Common Questions / Answers
Honestly, this is difficult to understand. Here is my attempt. Once Traefik starts, static configuration cannot change without a restart, however Traefik will ingest changes to dynamic configuration and adapt. In a perfect world, everything would be dynamic, but currently some config must be defined statically at startup. Let's explore the differences
Static Configuration (known as the Startup configuration)
- Deals with EntryPoints to Traefik (the main entry points, usually 80 and 443)
- Handles provider setup (i.e. providers.docker, providers.file.directory)
- Handles setup for Tracing, AccessLogs, Metrics, and CertificateResolvers
- Can only be defined in one of three places (mutually exclusive), you must choose only 1. Choices are TOML/YAML config file, Command arguments, or ENV variables
- You can view the full list of Static configuration arguments by running this command: docker run traefik:v2.2 --help
Dynamic Configuration (all the routing stuff)
- Retrieves it's configruation from providers, in our case Docker
- Listens to events from the provider (Docker, File etc..) and adapts based on changes
- Can be defined in standalone TOML/YAML file(s), inside Docker Compose's service Label section, or both. Common to put reusuable config in File and Service config in Docker Labels
- Handles all routing details to services. For example: This host name goes to this service, this service uses this auth middleware, this service should use TLS from the LE certificate resolver
- You can see Dynamic Configuration Reference Here


